认证篇之表单登录的自定义配置
1. 简介
Spring Security 提供了默认的认证规则,同时也支持各种自定义配置。本文档的重点在于深入研究 Spring Security 中表单登录的相关自定义配置。
2. 自定义登录页
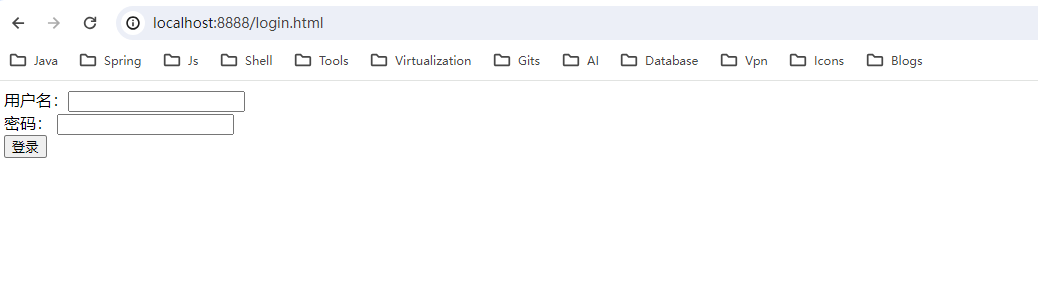
对于未认证的请求,Spring Security 会将其重定向到默认的登录页面。同时,也支持自定义登录页面。首先,可以创建一个简单的登录页 login.html,并将其放置在 resources\static 目录下。
<!DOCTYPE html>
<html lang="en">
<head>
    <meta charset="UTF-8">
    <title>登录页面</title>
</head>
<body>
<form action="/login" method="post">
    用户名:<input type="text" name="username"/><br>
    密码: <input type="password" name="password"/><br>
    <input type="submit" value="登录"/>
</form>
</body>
</html>在配置类中,设置表单登录的loginPage、loginProcessingUrl:
@Configuration
// 开启 Spring Security,debug:是否开启Debug模式
@EnableWebSecurity(debug = false)
public class CactusSecurityConfig {

    @Bean
    public SecurityFilterChain securityFilterChain(HttpSecurity http) throws Exception {

        http
                // 配置所有的Http请求必须认证后才能访问
                .authorizeHttpRequests((authorize) -> authorize
                        .requestMatchers("/login.html").permitAll()
                        .anyRequest().authenticated()
                )
                // 开启Basic认证
                .httpBasic(withDefaults())
                // 开启表单登录
                .formLogin(formLoginConfigurer ->
                        formLoginConfigurer.loginPage("/login.html") // 自定义登录页面(注意要同步配置 loginProcessingUrl)
                                            .loginProcessingUrl("/login")); // 自定义登录请求路径 URL


        return http.build();
    }


    /**
     * 注入自定义 UserDetailsService 实现类
     * @return UserDetailsService
     */
    @Bean
    CactusUserDetailsService cactusUserDetailsService() {
        return new CactusUserDetailsService();
    }

    /**
     * 密码器
     */
    @Bean
    PasswordEncoder passwordEncoder() {
        return new BCryptPasswordEncoder();
    }

//    @Bean
//    CactusOncePerRequestFilter oncePerRequestFilter() {
//        return new CactusOncePerRequestFilter();
//    }

}
访问测试接口,会跳转到自定义登录页:
3. 自定义登录请求处理路径
Spring Security默认对POST /login的请求进行认证处理,也支持自定义登录请求处理路径。
修改表单登录loginProcessingUrl为自定义路径:
        http
                // 配置所有的Http请求必须认证后才能访问
                .authorizeHttpRequests((authorize) -> authorize
                        .requestMatchers("/login.html").permitAll()
                        .anyRequest().authenticated()
                )
                // 开启Basic认证
                .httpBasic(withDefaults())
                // 开启表单登录
                .formLogin(formLoginConfigurer ->
                        formLoginConfigurer.loginPage("/login.html") // 自定义登录页面(注意要同步配置 loginProcessingUrl)
                                            .loginProcessingUrl("/custom/login")); // 自定义登录请求路径 URL
页面中也同步修改提交表单时的请求路径,ji
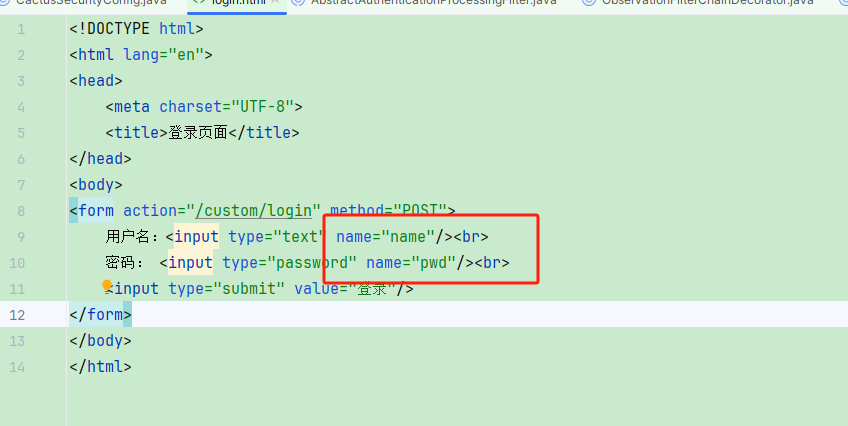
<form action="/custom/login" method="POST">
    用户名:<input type="text" name="username"/><br>
    密码: <input type="password" name="password"/><br>
    <input type="submit" value="登录"/>
</form>
注意 POST 可不能写成小的了,这里是区分大小写
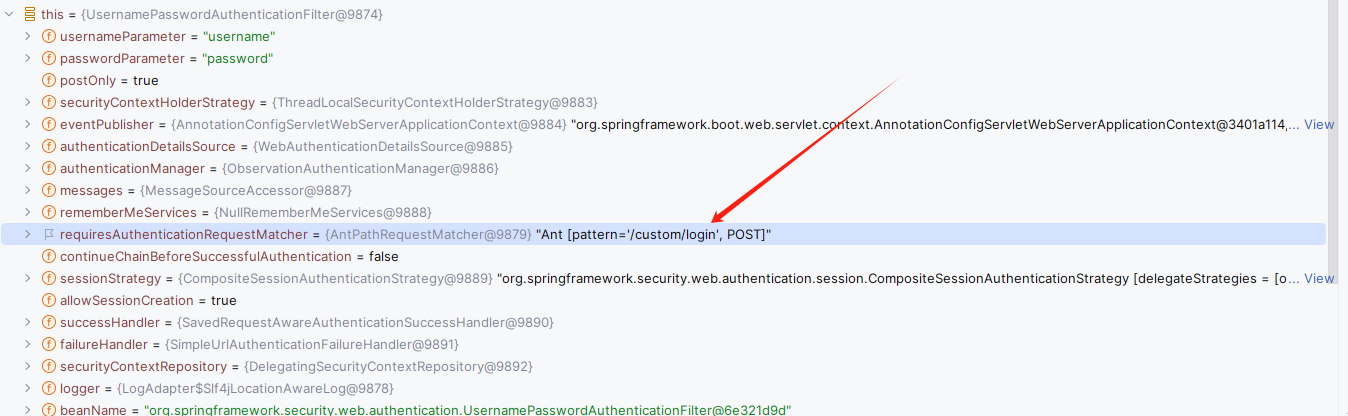
重启项目,进行登录,可以发现当前用户名密码认证过滤器中处理登录的路径变为了我们的自定义:
4. 自定义用户名密码参数名称
默认表单登录中用户名密码参数名称为username、password:
	public static final String SPRING_SECURITY_FORM_USERNAME_KEY = "username";

	public static final String SPRING_SECURITY_FORM_PASSWORD_KEY = "password";
在配置类中设置自定义参数名称即可:
                // 开启表单登录
                .formLogin(form -> form
                        .loginPage("/login.html") // 自定义登录页面(注意要同步配置 loginProcessingUrl)
                        .loginProcessingUrl("/custom/login")
                        .usernameParameter("name")
                        .passwordParameter("pwd"))// 自定义登录请求路径 URL
自定义登录页中也需要修改参数名:
5. 自定义登录成功跳转地址
如果通过其他访问地址跳转到登录页,登录成功后,默认会返回到原始的地址。但如果直接访问登录页,则会跳转到根路径 /。在这种情况下,Spring Boot会自动查找是否存在 index.html,如果不存在则显示空白页。
为了自定义登录成功后的跳转地址,可以通过配置 successForwardUrl 来实现。这时使用的是请求转发。
                // 开启表单登录
                .formLogin(form -> form
                        .loginPage("/login.html") // 自定义登录页面(注意要同步配置 loginProcessingUrl)
                        .loginProcessingUrl("/custom/login") // 自定义登录请求路径 URL
                        .usernameParameter("name") // 自定义用户名参数名称
                        .passwordParameter("pwd") //自定义密码参数名称
.successForwardUrl("/index")) // 自定义登录成功后转发的地址(请求转发,地址栏不变)也可以配置defaultSuccessUrl,使用的是重定向:
                // 开启表单登录
                .formLogin(form -> form
                        .loginPage("/login.html") // 自定义登录页面(注意要同步配置 loginProcessingUrl)
                        .loginProcessingUrl("/custom/login") // 自定义登录请求路径 URL
                        .usernameParameter("name") // 自定义用户名参数名称
                        .passwordParameter("pwd") //自定义密码参数名称
                        .defaultSuccessUrl("/index")) // 自定义登录成功后重定向的地址(重定向,地址栏变),会优先跳转到登陆前访问的页面,也可以设置总是跳转到该地址
6. 自定义登录失败跳转地址
默认情况下,认证失败后会重定向到 /login?error,然后再次重定向到登录页并显示错误信息。
与自定义登录成功跳转地址相似,你也可以通过配置认证失败时的跳转地址来实现。这样的配置方式与之前提到的 successForwardUrl 类似。
                // 开启表单登录
                .formLogin(form -> form
                        .loginPage("/login.html") // 自定义登录页面(注意要同步配置 loginProcessingUrl)
                        .loginProcessingUrl("/custom/login") // 自定义登录请求路径 URL
                        .usernameParameter("name") // 自定义用户名参数名称
                        .passwordParameter("pwd") //自定义密码参数名称
                        .defaultSuccessUrl("/index") // 自定义登录成功后重定向的地址(重定向,地址栏变),会优先跳转到登陆前访问的页面,也可以设置总是跳转到该地址
                        .failureForwardUrl("/login/failure") // 自定义登录失败后跳转的地址(转发,地址栏不变)
                        //.failureUrl("/login/failure") // 自定义登录失败后重定向的地址(重定向,地址栏变)

                )
7. 自定义认证成功处理器
默认情况下,登录成功后会跳转到首页或者登录前访问的地址,同时也可以自定义跳转路径。
然而,随着现代应用的发展,许多应用都采用前后端分离的架构,通过JSON实现交互。在这种情况下,后端可能不包含任何页面,也无需处理页面跳转。相反,它只需要通知前端登录成功,并返回用户信息,由前端决定是否进行页面跳转。
在登录流程中,登录成功后会调用认证成功处理器(默认为 SavedRequestAwareAuthenticationSuccessHandler)来处理页面跳转。这个处理器的默认行为是跳转到之前访问的地址。
	protected void successfulAuthentication(HttpServletRequest request, HttpServletResponse response, FilterChain chain,
			Authentication authResult) throws IOException, ServletException {
        // 把认证信息封装到 SecurityContext 中
		SecurityContext context = this.securityContextHolderStrategy.createEmptyContext();
		context.setAuthentication(authResult);
		this.securityContextHolderStrategy.setContext(context);
		this.securityContextRepository.saveContext(context, request, response);
		if (this.logger.isDebugEnabled()) {
			this.logger.debug(LogMessage.format("Set SecurityContextHolder to %s", authResult));
		}
        //  rememberMe 处理
		this.rememberMeServices.loginSuccess(request, response, authResult);
		if (this.eventPublisher != null) {
            // 发布认证成功事件
			this.eventPublisher.publishEvent(new InteractiveAuthenticationSuccessEvent(authResult, this.getClass()));
		}
        // 调用成功处理器,重定向到登录前 URL
		this.successHandler.onAuthenticationSuccess(request, response, authResult);
}那么只需要自定义认证成功处理器,就可以直接实现JSON返回了,AuthenticationSuccessHandler 用于处理用户身份验证成功后的处理策略,实现可以随心所欲:
public interface AuthenticationSuccessHandler {


	default void onAuthenticationSuccess(HttpServletRequest request, HttpServletResponse response, FilterChain chain,
			Authentication authentication) throws IOException, ServletException {
		onAuthenticationSuccess(request, response, authentication);
		chain.doFilter(request, response);
	}

	// 当用户已成功通过身份验证时调用
	void onAuthenticationSuccess(HttpServletRequest request, HttpServletResponse response,
			Authentication authentication) throws IOException, ServletException;

}
自定义登录成功后直接返回 JSON:
    /**
     * 登录成功后直接返回 JSON
     *
     * @param request        请求
     * @param response       响应
     * @param authentication 成功认证的用户信息
     */
    @Override
    public void onAuthenticationSuccess(HttpServletRequest request, HttpServletResponse response, Authentication authentication) throws IOException, ServletException {
        response.setContentType("application/json;charset=utf-8"); // 返回JSON
        response.setStatus(HttpStatus.OK.value());  // 状态码 200
        Map<String, Object> result = new HashMap<>(); // 返回结果
        result.put("msg", "登录成功");
        result.put("code", 200);
        result.put("data", authentication);
        response.getWriter().write(JSONUtil.toJsonStr(result));
    }
配置表单登录:
// 开启表单登录
.formLogin(form -> form
.loginPage("/login.html") // 自定义登录页面(注意要同步配置 loginProcessingUrl)
.loginProcessingUrl("/custom/login") // 自定义登录请求路径 URL
.usernameParameter("name") // 自定义用户名参数名称
.passwordParameter("pwd") //自定义密码参数名称
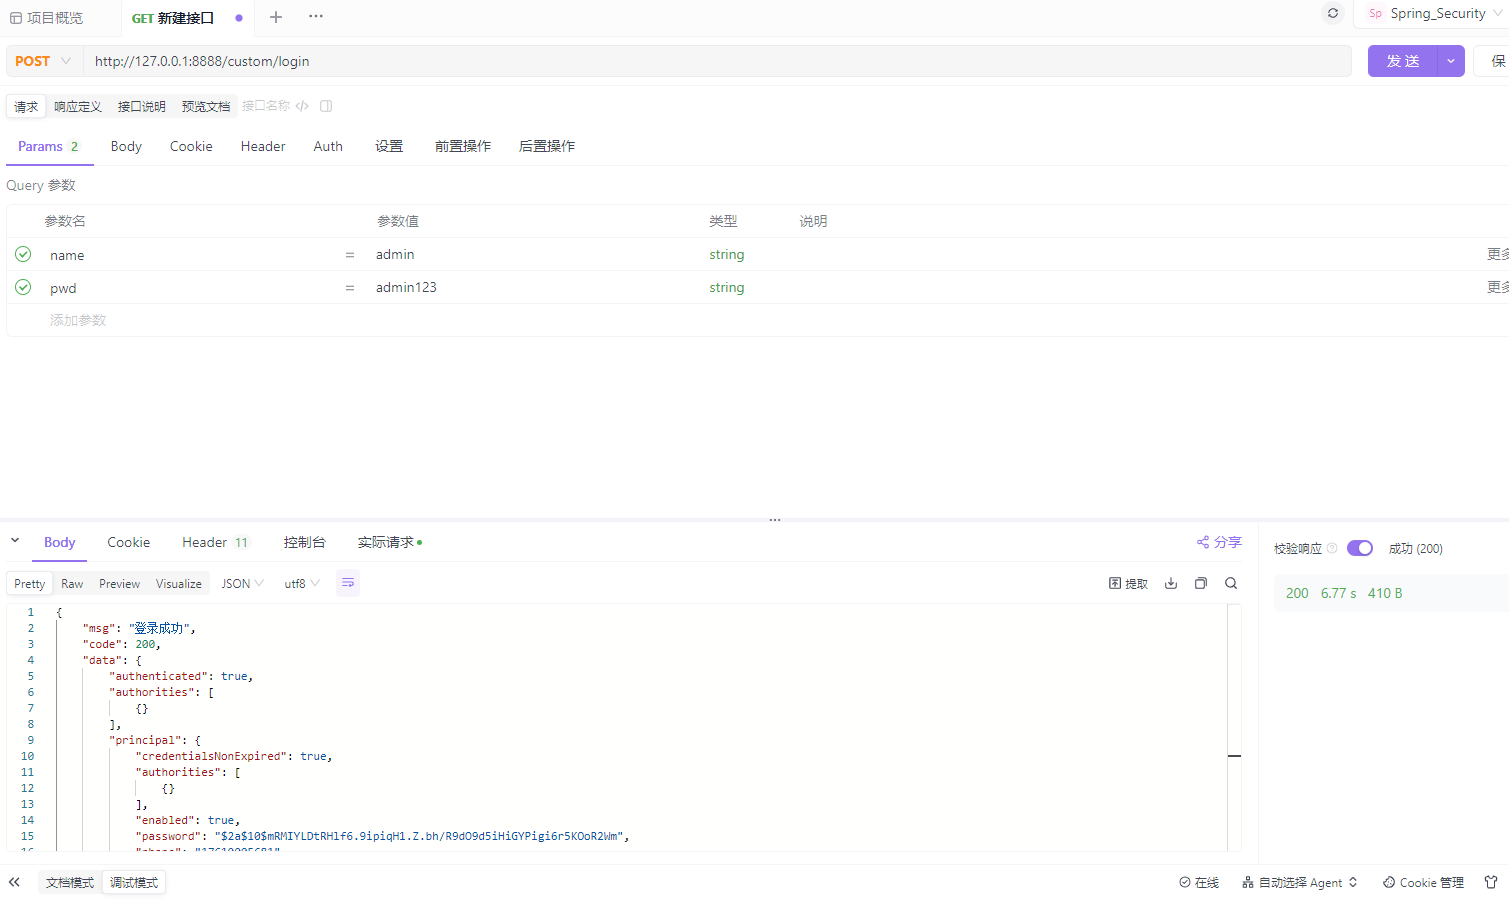
.successHandler(new JsonAuthenticationSuccessHandler())apifox 测试结果如下:
8. 自定义认证失败处理器
登录失败时,默认还是会跳转到内部登录页:
在前后端分离时,还是需要返回JSON,由前端去处理,同理定义一个认证失败处理器即可:
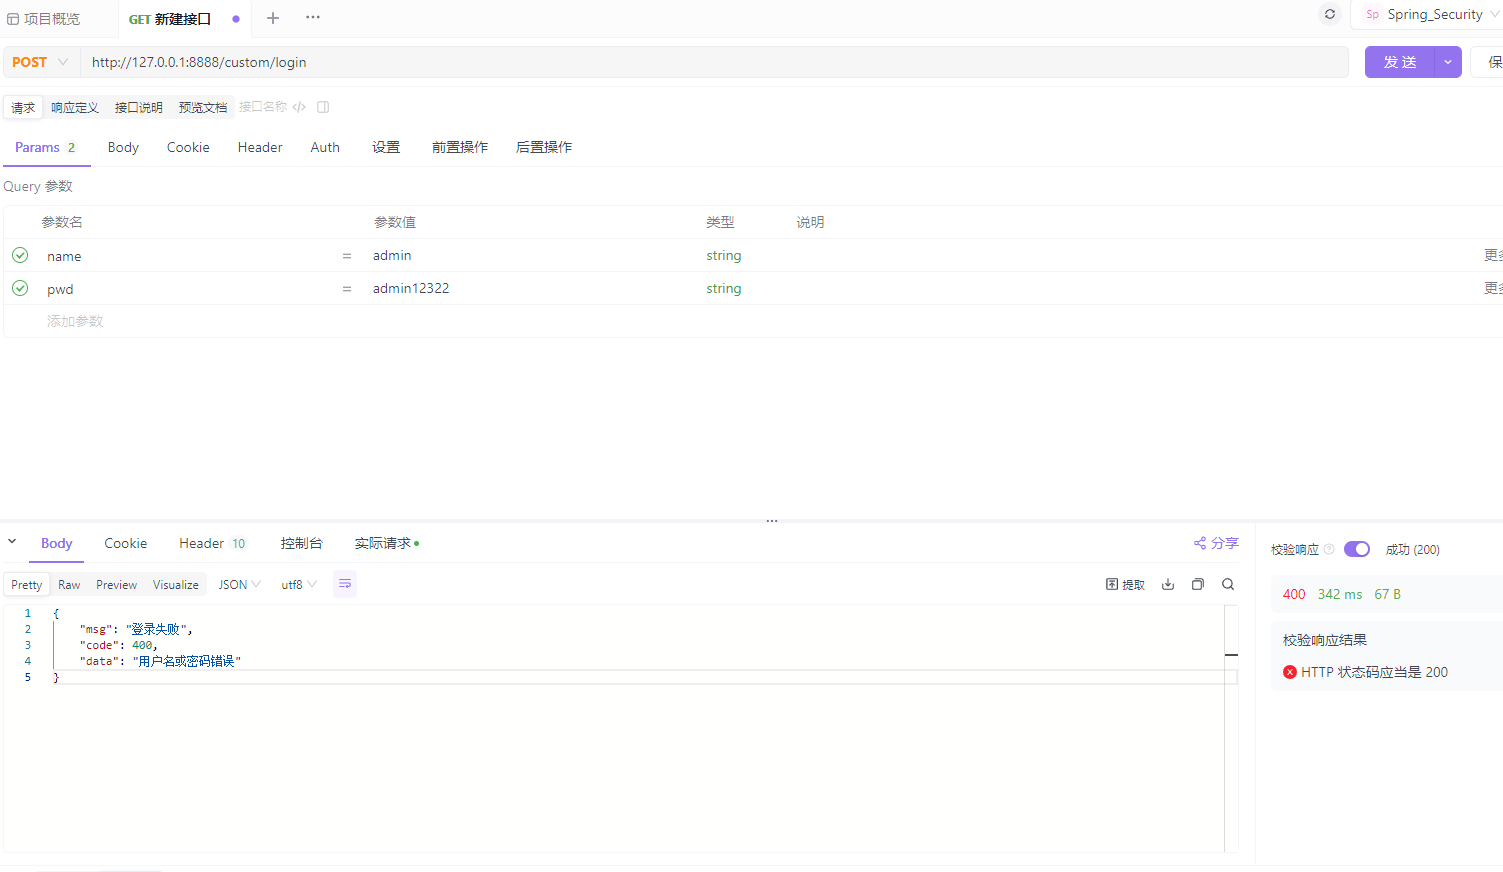
    @Override
    public void onAuthenticationFailure(HttpServletRequest request, HttpServletResponse response, AuthenticationException exception) throws IOException, ServletException {
        response.setContentType("application/json;charset=utf-8"); // 返回JSON
        response.setStatus(HttpStatus.BAD_REQUEST.value());  // 状态码 400
        Map<String, Object> result = new HashMap<>(); // 返回结果
        result.put("msg", "登录失败");
        result.put("code", 400);
        result.put("data", exception.getMessage());
        response.getWriter().write(JSONUtil.toJsonStr(result));
    }
把配置项加入表单登录配置:
// 开启表单登录
.formLogin(form -> form
.loginPage("/login.html") // 自定义登录页面(注意要同步配置 loginProcessingUrl)
.loginProcessingUrl("/custom/login") // 自定义登录请求路径 URL
.usernameParameter("name") // 自定义用户名参数名称
.passwordParameter("pwd") //自定义密码参数名称
.successHandler(new JsonAuthenticationSuccessHandler())
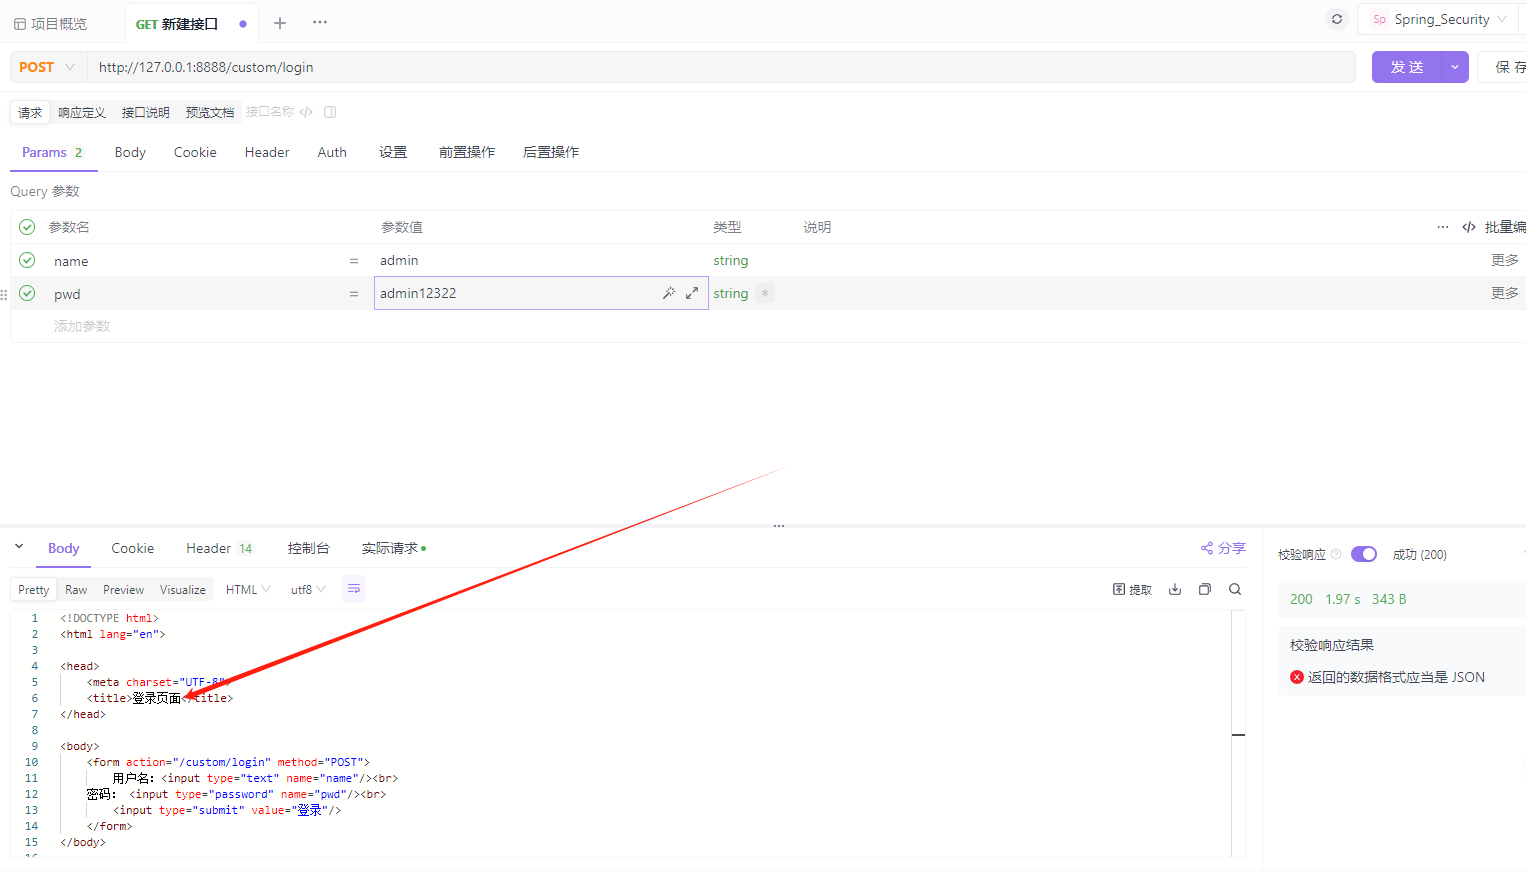
.failureHandler(new JsonAuthenticationFailureHandler())测试结果如下: