认证篇之使用数据库存储用户
1. 简介
在用户认证过程中,常见的方式是通过用户名和密码进行验证。认证服务首先根据提供的用户名从存储中检索用户信息,随后验证输入的密码是否与存储中的密码匹配。Spring Security 提供多种灵活的用户名和密码存储机制供选择,如下:
内存:将用户信息直接配置在内存中,适用于小型应用或者测试环境。这种方式的配置相对简单,但不适合生产环境。
@Override
protected void configure(AuthenticationManagerBuilder auth) throws Exception {
    auth
        .inMemoryAuthentication()
            .withUser("user").password("password").roles("USER")
            .and()
            .withUser("admin").password("admin").roles("USER", "ADMIN");
}
关系型数据库:使用关系型数据库存储用户信息,Spring Security提供了默认的数据库表结构,也可以进行自定义表结构。
@Autowired
private DataSource dataSource;

@Override
protected void configure(AuthenticationManagerBuilder auth) throws Exception {
    auth
        .jdbcAuthentication()
            .dataSource(dataSource)
            .usersByUsernameQuery("SELECT username, password, enabled FROM users WHERE username=?")
            .authoritiesByUsernameQuery("SELECT username, authority FROM authorities WHERE username=?");
}
在上述配置中,通过
usersByUsernameQuery和authoritiesByUsernameQuery指定了查询用户信息和权限信息的SQL语句。
使用
UserDetailsService的自定义数据存储:实现自定义的UserDetailsService接口,从任何数据源加载用户信息。这种方式适用于各种非关系型数据库或其他数据源。@Service public class CustomUserDetailsService implements UserDetailsService { @Autowired private UserRepository userRepository; @Override public UserDetails loadUserByUsername(String username) throws UsernameNotFoundException { User user = userRepository.findByUsername(username); if (user == null) { throw new UsernameNotFoundException("User not found with username: " + username); } return new CustomUserDetails(user); } }然后在配置中使用自定义的
UserDetailsService:@Autowired private UserDetailsService userDetailsService; @Override protected void configure(AuthenticationManagerBuilder auth) throws Exception { auth.userDetailsService(userDetailsService); }
使用
LDAP认证的LDAP存储:如果你的用户信息存储在LDAP目录中,可以使用Spring Security对LDAP的支持。@Override protected void configure(AuthenticationManagerBuilder auth) throws Exception { auth .ldapAuthentication() .userDnPatterns("uid={0},ou=people") .groupSearchBase("ou=groups") .contextSource() .url("ldap://localhost:389/dc=springframework,dc=org") .managerDn("cn=admin,dc=springframework,dc=org") .managerPassword("password"); }上述配置中,通过LDAP连接进行用户认证和授权。
本篇文档主要学习使用数据库存储用户信息。
2. 环境搭建
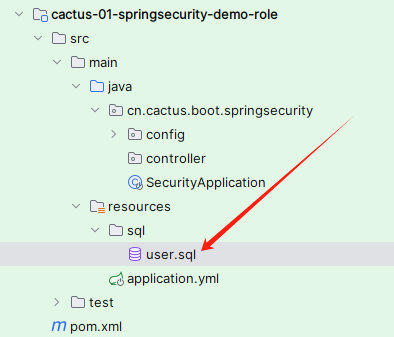
2.1 创建用户表
创建数据库并执行源码地址中的SQL脚本:
2.2 集成 Mybatis Plus
引入Mybatis Plus、Mysql等程依赖开发工具包:
<dependencies>
    <!-- 进行 Spring MVC 的自动化配置 -->
    <dependency>
        <groupId>org.springframework.boot</groupId>
        <artifactId>spring-boot-starter-web</artifactId>
    </dependency>
    <!-- 进行 Spring Security 的自动化配置 -->
    <dependency>
        <groupId>org.springframework.boot</groupId>
        <artifactId>spring-boot-starter-security</artifactId>
    </dependency>
    <!-- 进行 Mybatis-Plus 的自动化配置 -->
    <dependency>
        <groupId>com.baomidou</groupId>
        <artifactId>mybatis-plus-boot-starter</artifactId>
        <version>3.5.4.1</version>
    </dependency>
    <!-- 进行数据库的连接 -->
    <dependency>
        <groupId>com.mysql</groupId>
        <artifactId>mysql-connector-j</artifactId>
        <scope>runtime</scope>
    </dependency>
    <!-- 进行实体类动态生成set、get等信息的生成 -->
    <dependency>
        <groupId>org.projectlombok</groupId>
        <artifactId>lombok</artifactId>
    </dependency>
    <!-- 集成各种常用的工具包 -->
    <dependency>
        <groupId>cn.hutool</groupId>
        <artifactId>hutool-all</artifactId>
        <version>5.7.21</version>
    </dependency>
</dependencies>
在 application.yml 中配置数据源信息:
server:
  # 服务端口
  port: 8888

spring:
  # DataSource Config
  datasource:
    type: com.zaxxer.hikari.HikariDataSource
    driver-class-name: com.mysql.cj.jdbc.Driver
    url: jdbc:mysql://192.168.1.19:3306/security-user?zeroDateTimeBehavior=convertToNull&useUnicode=true&characterEncoding=UTF-8&serverTimezone=Asia/Shanghai&autoReconnect=true
    username: root
    password: Nstr.234808
在启动类上添加 @MapperScan 扫描:
@SpringBootApplication
@MapperScan("cn.cactus.boot.springsecurity.mapper")
public class SecurityApplication {

    public static void main(String[] args) {
        SpringApplication.run(SecurityApplication.class, args);
    }
}
2.3 集成生成代码工具
使用Mybatis Plus代码生成器生成各层代码。首先引入代码生成器和模板引擎:
<!--代码生成器-->
<dependency>
    <groupId>com.baomidou</groupId>
    <artifactId>mybatis-plus-generator</artifactId>
    <version>3.5.2</version>
</dependency>
<dependency>
    <groupId>org.freemarker</groupId>
    <artifactId>freemarker</artifactId>
    <version>2.3.31</version>
</dependency>
添加生成工具类,修改一些数据库地址、包名等参数:
public class AutoGeneratorUtils {

    public static void main(String[] args) throws IOException, URISyntaxException {
        String encode = new BCryptPasswordEncoder().encode("123456");
        System.out.println(encode);
        FastAutoGenerator.create("jdbc:mysql://192.168.1.19:3306/security-user", "root", "Nstr.234808")
                .globalConfig(builder -> {
                    builder.author("cactusli") // 设置作者
                            .enableSwagger() // 开启 swagger 模式
                            .fileOverride() // 覆盖已生成文件
                            .outputDir("D://"); // 指定输出目录
                })
                .dataSourceConfig(builder -> builder.typeConvertHandler((globalConfig, typeRegistry, metaInfo) -> {
                    int typeCode = metaInfo.getJdbcType().TYPE_CODE;
                    if (typeCode == Types.SMALLINT) {
                        // 自定义类型转换
                        return DbColumnType.INTEGER;
                    }
                    return typeRegistry.getColumnType(metaInfo);

                }))
                .packageConfig(builder -> {
                    builder.parent("cn.cactus.boot.springsecurity") // 设置父包名
                            //.moduleName("system") // 设置父包模块名
                            .pathInfo(Collections.singletonMap(OutputFile.xml, "D://")); // 设置mapperXml生成路径
                })
                .strategyConfig(builder -> {
                    builder.addInclude("t_user") // 设置需要生成的表名
                            .addTablePrefix("t_", "c_"); // 设置过滤表前缀
                })
                .templateEngine(new FreemarkerTemplateEngine()) // 使用Freemarker引擎模板,默认的是Velocity引擎模板
                .execute();

    }
}
把生成的代码复制到项目中:
2.4 测试验证代码
在 pom.xml 文件中 引入 Spring Boot Test 测试启动场景依赖。
<dependency>
    <groupId>org.springframework.boot</groupId>
    <artifactId>spring-boot-starter-test</artifactId>
    <scope>test</scope>
</dependency>
在 test 目录下新建 CactusSpringSecurityDemoTest 测试类代码如下:
@SpringBootTest
class CactusSpringSecurityDemoTest {

    @Resource
    private IUserService userService;

    @Test
    void  testSelectUser() {
        User test = userService.getOne(new LambdaQueryWrapper<User>().eq(User::getUserName, "test"));
        System.out.println(test);
    }

}
代码成功运行后会输出以下日志:

3. 用户登录
3.1 首先看UserDetailsService接口
这里我们需要从数据库中获取用户信息,Spring Security提供了UserDetailsService接口查询用户数据。
该接口中,只声明了一个根据用户名加载用户信息的方法:
// 加载用户特定数据的核心接口。
// 它在整个框架中用作用户 DAO,并且是 DaoAuthenticationProvider.
// 该接口只需要一种只读方法,这简化了对新数据访问策略的支持。
public interface UserDetailsService {

	/**
        根据用户名定位用户。在实际实现中,搜索可能区分大小写,也可能不区分大小写,具体取决于实现实例的配置方式。在这种情况下, UserDetails 返回的对象可能具有与实际请求的用户名不同的用户名。
        参数:username – 标识需要其数据的用户的用户名。
        返回:完全填充的用户记录(从不 null)
        抛出:UsernameNotFoundException – 如果找不到用户或用户没有 GrantedAuthorit
	 */
	UserDetails loadUserByUsername(String username) throws UsernameNotFoundException;

}
Spring Security默认提供了几个实现类:
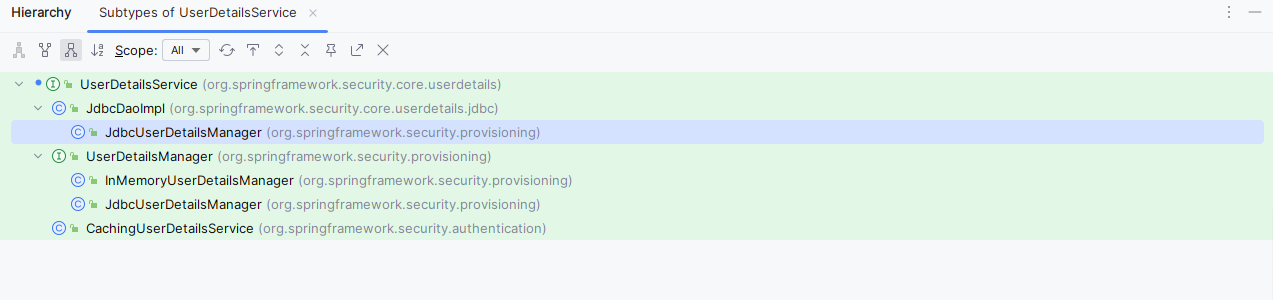
从类名称已经比较好理解,支持内存、数据库查询用户。首先我们看下JdbcDaoImpl是如何查询用户的,是不是满足我们的业务要求。
查看其loadUserByUsername方法执行逻辑:
@Override
public UserDetails loadUserByUsername(String username) throws UsernameNotFoundException {
     // select username,password,enabled from users where username = ?
    // 1. JdbcTemplate 执行SQL
    List<UserDetails> users = loadUsersByUsername(username);
    if (users.size() == 0) {
        // 2. 没有查询到,抛出 UsernameNotFoundException
        this.logger.debug("Query returned no results for user '" + username + "'");
        throw new UsernameNotFoundException(this.messages.getMessage("JdbcDaoImpl.notFound",
                new Object[] { username }, "Username {0} not found"));
    }
    // 3. 如果查询多条用户信息,则取第一条数据
    UserDetails user = users.get(0); // contains no GrantedAuthority[]
    Set<GrantedAuthority> dbAuthsSet = new HashSet<>(); // 存放用户授予的权限
    // 4. 开启了查询权限,执行SQL:select username,authority from authorities where username = ?
    // 将查询到的结果放入集合中
    if (this.enableAuthorities) {
        dbAuthsSet.addAll(loadUserAuthorities(user.getUsername()));
    }
    // 5. 开启了权限分组,=》select g.id, g.group_name, ga.authority from groups g, group_members gm, group_authorities ga where gm.username = ? and g.id = ga.group_id and g.id = gm.group_id
    if (this.enableGroups) {
        dbAuthsSet.addAll(loadGroupAuthorities(user.getUsername()));
    }
    // set 不重复集合 =》 list
    List<GrantedAuthority> dbAuths = new ArrayList<>(dbAuthsSet);
    addCustomAuthorities(user.getUsername(), dbAuths);
    // 6. 当前用户没有任何权限,也会抛出 UsernameNotFoundException
    if (dbAuths.size() == 0) {
        this.logger.debug("User '" + username + "' has no authorities and will be treated as 'not found'");
        throw new UsernameNotFoundException(this.messages.getMessage("JdbcDaoImpl.noAuthority",
                new Object[] { username }, "User {0} has no GrantedAuthority"));
    }
    // 7. 创建 UserDetails 类型的用户对象并返回
    return createUserDetails(username, user, dbAuths);
}通过以上的源码分析,JdbcDaoImpl中的SQL都是固定的,而且为了更好的扩展,我们可以仿照其逻辑自定义实现UserDetailsService接口。
3.2 UserDetails 接口
UserDetailsService 接口要求返回一个 UserDetails 类型的对象,这个命名本身已经非常直观,它表示一个封装了用户信息的类。我们的任务是将从数据库或其他数据源查询得到的用户对象转换为 Spring Security 框架支持的用户对象,以便进行认证、授权等操作。
UserDetails 接口源码如下:
public interface UserDetails extends Serializable {

	// 返回授予用户的权限集合。
	Collection<? extends GrantedAuthority> getAuthorities();

    // 返回用于对用户进行身份验证的密码。
	String getPassword();

    // 返回用于对用户进行身份验证的用户名。
	String getUsername();

	// 用户的帐户是否已过期。无法对过期的帐户进行身份验证
    // 返回 true 用户的帐户有效(即未过期), false 不再有效(即已过期)
	boolean isAccountNonExpired();

	// 用户是已锁定还是已解锁。无法对锁定的用户进行身份验证。
    // 返回:true 用户未锁定, false 否则
	boolean isAccountNonLocked();

	// 用户的凭据(密码)是否已过期。过期的凭据会阻止身份验证。
    // 返回:true 用户的凭据有效(即未过期), false 不再有效(即已过期)
	boolean isCredentialsNonExpired();

	// 用户是启用还是禁用。无法对禁用的用户进行身份验证。
    // 返回:true 用户已启用, false 否则
	boolean isEnabled();

}
Spring Security默认提供了一个实现类User源码如下:
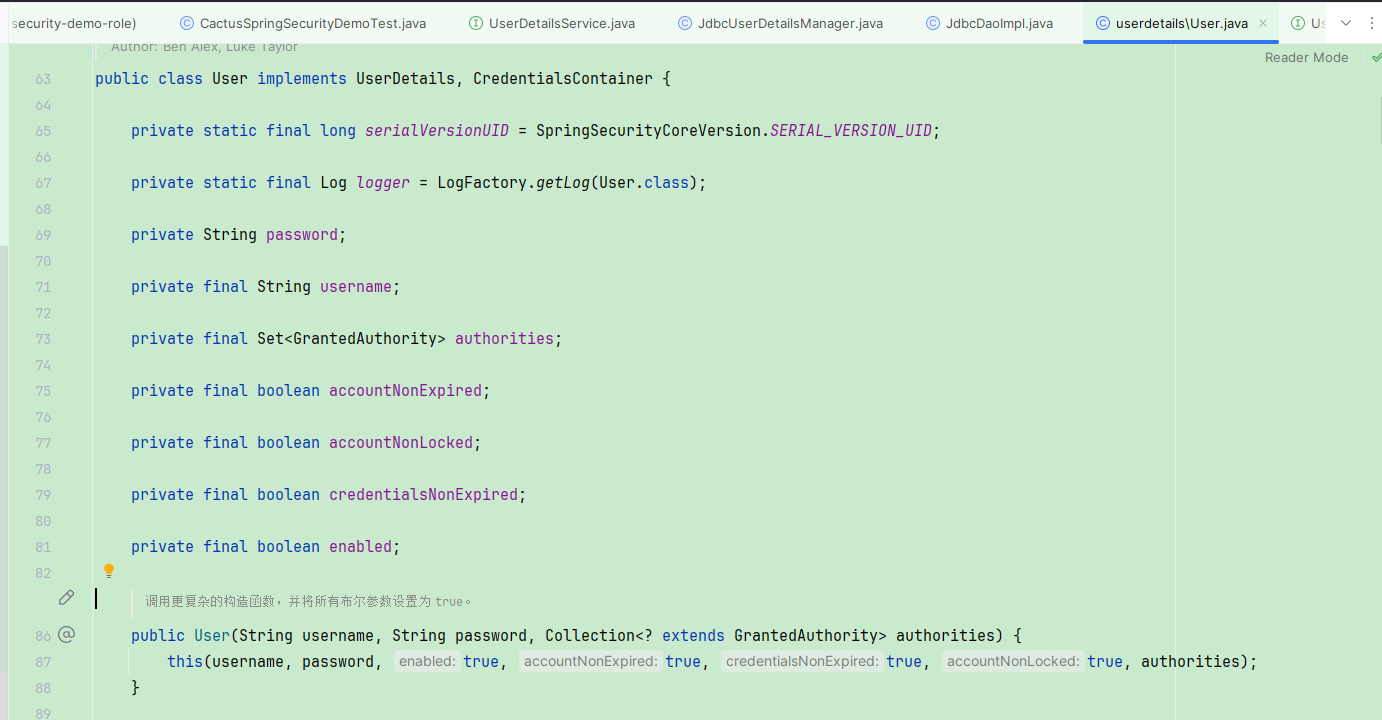
目前来说,框架提供的User类,已经够用,但是本着可能需要扩展的情况,我们也需要自定义实现UserDetails 接口。
3.3 自定义UserDetails 接口
实现 UserDetails接口,代码如下:
@Data
public class CactusUserDetails implements UserDetails {
    private String password;
    private final String username;
    private final String phone; // 扩展字段,手机号放入用户信息中
    private final Set<GrantedAuthority> authorities;
    private final boolean accountNonExpired;
    private final boolean accountNonLocked;
    private final boolean credentialsNonExpired;
    private final boolean enabled;

    public PearlUserDetails( String username,String password, String phone, List<GrantedAuthority> authorities, boolean accountNonExpired, boolean accountNonLocked, boolean credentialsNonExpired, boolean enabled) {
        this.password = password;
        this.phone = phone;
        this.username = username;
        this.accountNonExpired = accountNonExpired;
        this.accountNonLocked = accountNonLocked;
        this.credentialsNonExpired = credentialsNonExpired;
        this.enabled = enabled;
        this.authorities = Collections.unmodifiableSet(sortAuthorities(authorities)); // 非空判断+排序
    }

    private static SortedSet<GrantedAuthority> sortAuthorities(Collection<? extends GrantedAuthority> authorities) {
        Assert.notNull(authorities, "Cannot pass a null GrantedAuthority collection");
        SortedSet<GrantedAuthority> sortedAuthorities = new TreeSet(new PearlUserDetails.AuthorityComparator());
        for (GrantedAuthority grantedAuthority : authorities) {
            Assert.notNull(grantedAuthority, "GrantedAuthority list cannot contain any null elements");
            sortedAuthorities.add(grantedAuthority);
        }
        return sortedAuthorities;
    }

    private static class AuthorityComparator implements Comparator<GrantedAuthority>, Serializable {
        private static final long serialVersionUID = 600L;
        public int compare(GrantedAuthority g1, GrantedAuthority g2) {
    	   // 两者都不应为 null,因为在将每个条目添加到集合之前都会对其进行检查。如果权限为 null,则它是自定义权限,应先于其他权限。
			if (g2.getAuthority() == null) {
				return -1;
			}
			if (g1.getAuthority() == null) {
				return 1;
			}
			return g1.getAuthority().compareTo(g2.getAuthority());
        }
    }
}然后实现UserDetailsService接口,代码如下:
@Slf4j
public class CactusUserDetailsService implements UserDetailsService {

    @Resource
    IUserService userService;

    @Override
    public UserDetails loadUserByUsername(String username) throws UsernameNotFoundException {
        // 1. 数据库查询用户
        User user = userService.getOne(new LambdaQueryWrapper<User>().eq(User::getUserName, username));
        if (ObjectUtil.isNull(user)) {
            log.error("Query returned no results for user '" + username + "'");
            throw new UsernameNotFoundException(StrUtil.format("Username {} not found", username));
        } else {
            // 2. 设置权限集合,后续需要数据库查询(授权篇讲解)
            List<GrantedAuthority> authorityList = AuthorityUtils.commaSeparatedStringToAuthorityList("role");
            // 3. 返回UserDetails类型用户
            return new CactusUserDetails(username, user.getPassword(), user.getPhone(), authorityList,
                    true, true, true, true); // 账号状态这里都直接设置为启用,实际业务可以存在数据库中
        }
    }

}
3.4 添加配置类项
Spring Security 6.0和之前的配置有些区别,后续会详细解读。
添加配置类,注入一个密码编码器:
@Configuration
// 开启 Spring Security,debug:是否开启Debug模式
@EnableWebSecurity(debug = false)
public class CactusSecurityConfig {

    /**
     * 注入自定义 UserDetailsService 实现类
     * @return UserDetailsService
     */
    @Bean
    CactusUserDetailsService cactusUserDetailsService() {
        return new CactusUserDetailsService();
    }

    /**
     * 密码器
     */
    @Bean
    PasswordEncoder passwordEncoder() {
        return new BCryptPasswordEncoder();
    }

}

}
3.5 测试添加用户功能
@Test
@DisplayName("插入一条用户数据")
void insertUserTest() {
    User user = new User();
    user.setUserName("admin");
    user.setPassword(new BCryptPasswordEncoder().encode("ckhop"));
    user.setLoginName("管理员");
    user.setPhone("17610005681");
    userService.save(user);
}
查看数据库,显示数据添加成功

3.6 测试登录
启动项目是用新添加的用户进行登录访问测试,在浏览器输入:http://localhost:8888/admin/testString
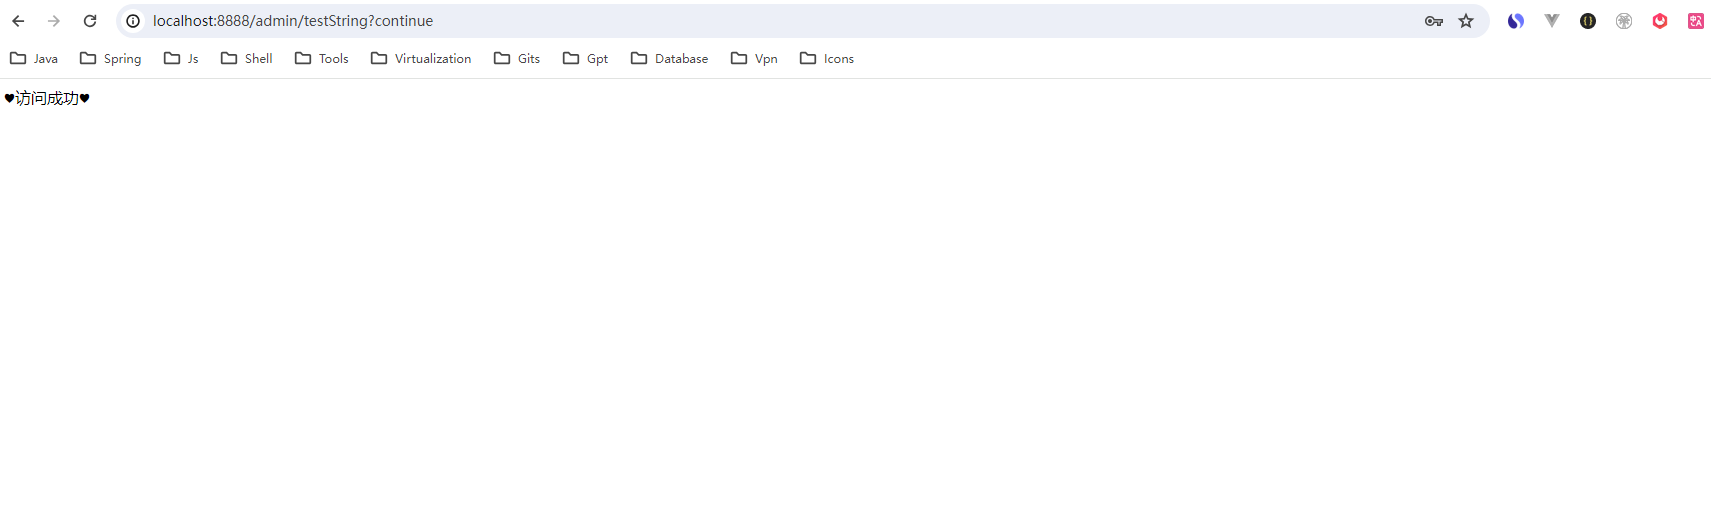
至此访问首页,使用数据库中的用户、密码登录,集成完毕。